Now you can use get2Clouds to protect your NAS device, and, as always, to protect an existing account on your favorite cloud provider: Google Drive, Dropbox, Box, Microsoft OneDrive, MagentaCLOUD, or SugarSync
Cloud Settings tab
- Select ‘Update get2Clouds’ to ensure you have the latest version.
- ‘Turn on Automatic Updates’ to update get2Clouds automatically.
- Choose your default cloud service by selecting from the list of cloud accounts.
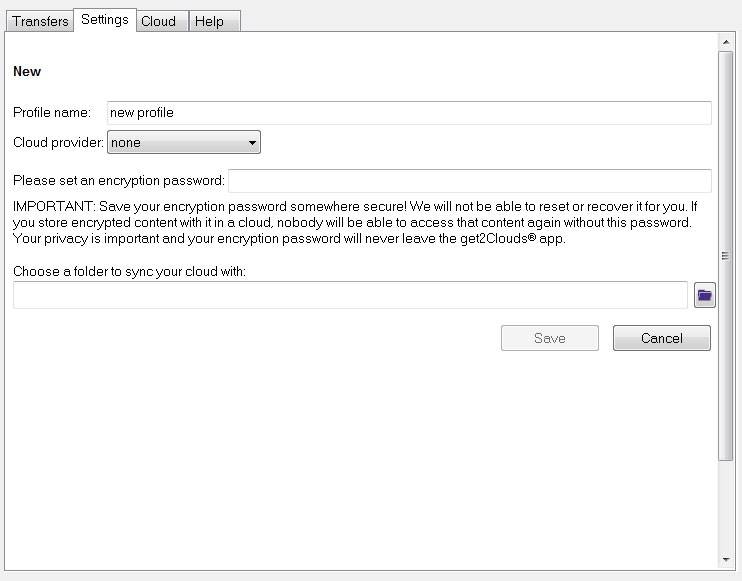
To add a new Cloud Account
- Under the ‘Cloud Settings’ tab select ‘New’.
- Enter your profile name.
- Select your cloud provider.
- Enter your cloud provider username.
* Note, you may be prompted to enter your username into an external browser. - Enter your cloud provider password.
- Create an encryption password. This is to ensure your data is encrypted and can only be accessed by you or someone you have securely shared this encryption password with.
- Choose a local folder to sync your cloud service with.
- Select ‘Save’.
- Repeat these steps to add other cloud provider accounts.
- To edit the information of an existing cloud account, select the cloud provider and ‘Edit’.
- To delete a cloud account, select the cloud provider and ‘Delete’.
** Note this will delete the selected cloud provider and all its files from your get2Clouds account.
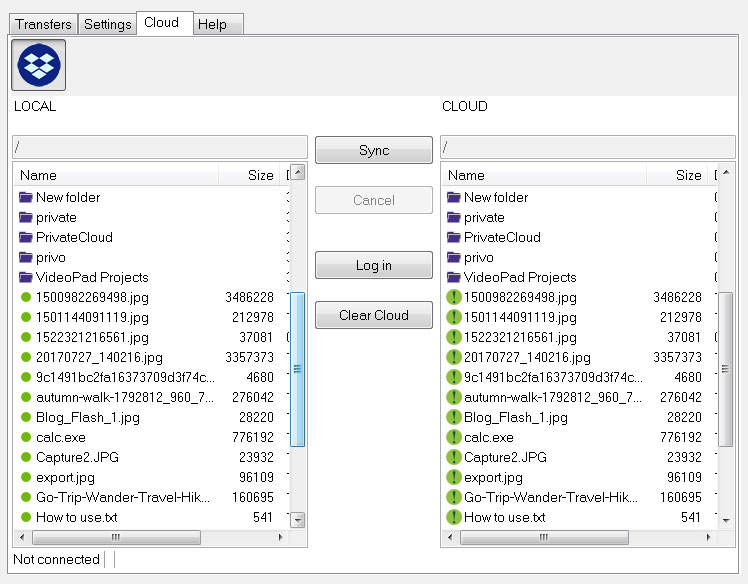
Sync with your Cloud Account
- Under the ‘Cloud’ tab, you will see the icon(s) for your cloud account(s)
- Choose the cloud you want to sync with.
- Select ‘Sync’ to automatically sync with your cloud account.
- Select ‘Log In’ to access your cloud.
You may be prompted with a new window from your cloud provider. - After log in, you will see the list of your local files on the left and the cloud account files on the right.
- Click ‘Clear Cloud’ if you wish to remove all the encrypted data from your cloud account.
** Please know that by selecting ‘Clear Cloud’ you may lose all the data you have stored in your cloud. You may want to do this in order to delete all cloud data and preserve it in its local state. That way you can ensure syncing only moves your files from local state to the cloud and not the other way around.
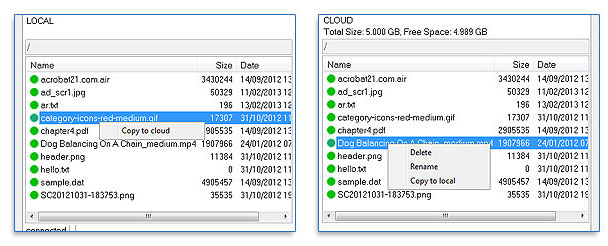
Moving Individual Files
- To sync individual files, right-click on the local file and select ‘Copy to cloud’. You can also drag and drop from the LOCAL list to the CLOUD list
- From the CLOUD list, right-click and either choose to ‘Delete’, ‘Rename’ or ‘Copy to local’
- You can also drag and drop a copy of a file from the CLOUD list to LOCAL list.
Transfer Files to Other People
- Select the ‘Transfers’ tab.
- Select ‘File Transfer’.
- Choose whether you want to send the file via instant message or via email. You can check both boxes to send the file both ways.
- Enter your name as the ‘Sender’ and your email address if you are sending via email.
- If you are sending the file via instant message, select ‘Choose contact’ from your list of contacts.
- If you are sending the file via email, add the email address of the recipient.
- Enter a comment to include your message.
- Choose the file you wish to transfer by selecting the folder button on the right of the entry field. You can also drag and drop the file into the entry field.
- Select the cloud provider profile you wish to use from the drop-down menu.
- Choose to ‘Automatically generate an encryption password’ or create your own encryption password to send to the recipient. You must then securely give this password to the recipient.
- Select ‘OK’.
- Once the file is uploaded, you may be prompted to allow get2Clouds to access your mail client. Make sure you allow this action. Your mail client will then open a new mail window with the comment and necessary links filled in.
- Enter any additional info and ‘Send’
Receiving a File Transfer
- To download a file you have received, make sure get2Clouds is installed on your computer.
- When get2Clouds is installed, click on the email link which will automatically launch get2Clouds and begin the file download.
Other Transfer Options
- You can pause a transfer by selecting the pause icon on the right.
- To delete a transfer select the ‘x’ button.
- Click the folder icon to open the folder containing the downloaded file
- Right-click a download to pause, open directly, open its destination folder, or remove it
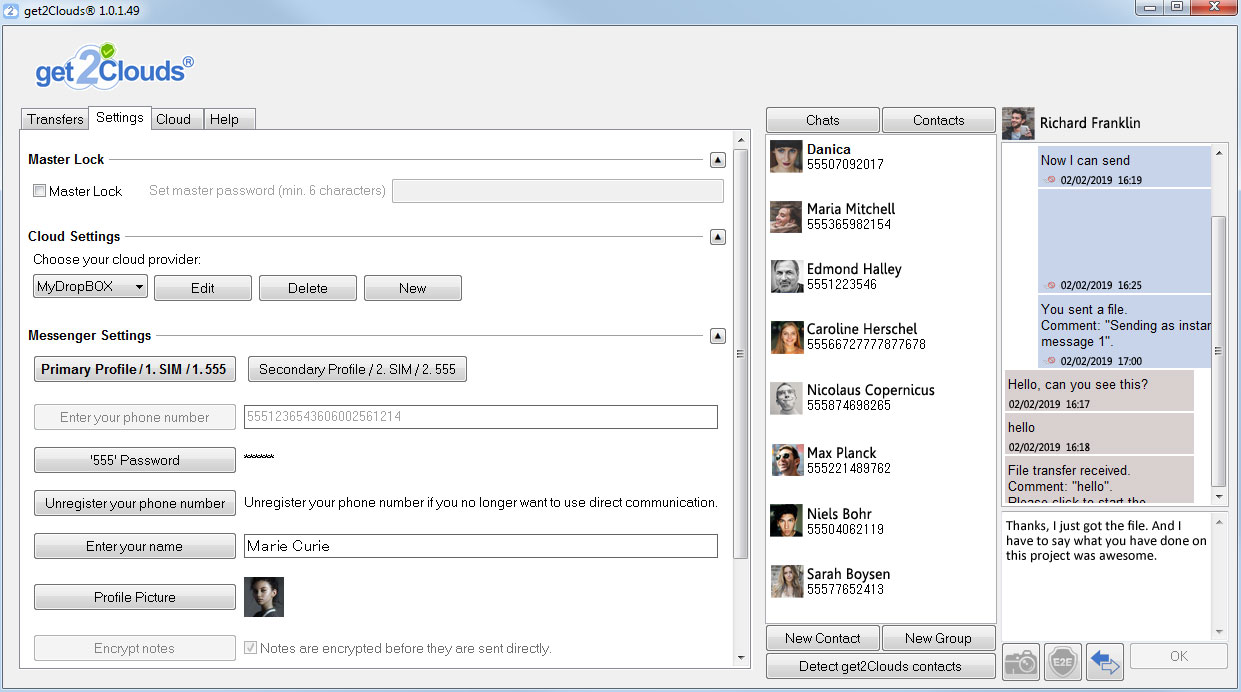
Messenger Settings
Secure End-to-End Messenger is available on get2Clouds.
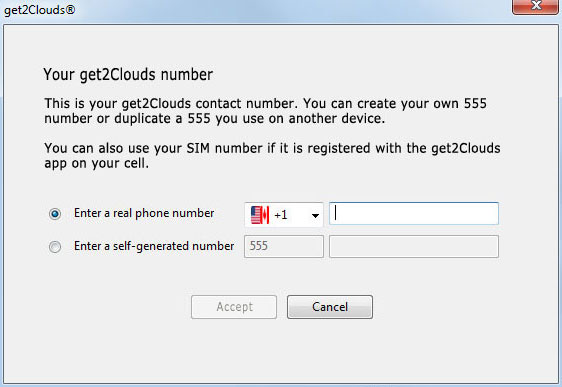
You can use your real phone number or create a self-generated 555 number.
You can use your real phone number or create a self-generated 555 number.
To register a 555 number:
- Select ‘Enter your phone number’.
- Select ‘Enter a self-generated 555 number’.
- Enter the number you wish to use (min. 5 digits)
- Set a 555 password.
This is to ensure that no one else can register the same 555 number. - Select ‘OK’ to successfully register your phone number.
To register your real phone number:
- Select ‘Enter your phone number’
- Choose your country code, enter your number and select ‘OK’
- A verification code will then be sent to your phone and to all devices that are registered to this number.
- Enter the verification code when prompted
- Select ‘OK’ to successfully register your phone number.
After having set a number, you can:
- Enter your name
- Chose your profile picture
- Select ‘Encrypt notes’ to ensure your notes are encrypted before they are sent.

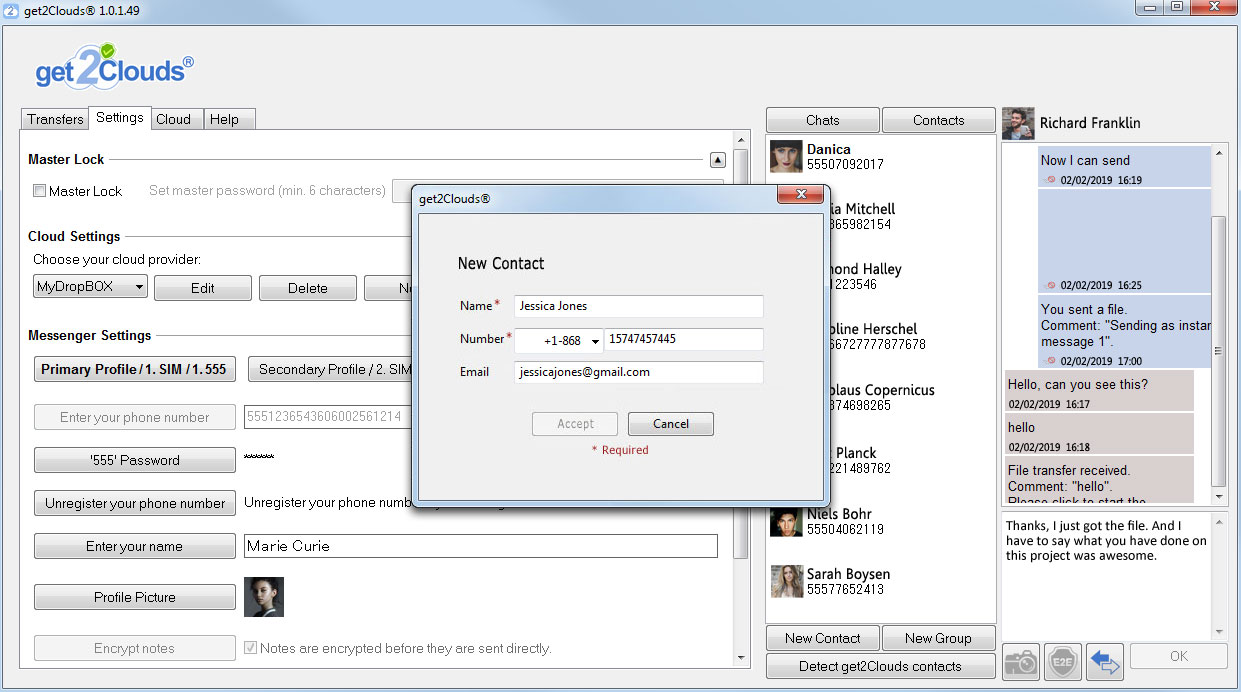
Add a new Contact to your Contact List
- Under the ‘Contacts’ tab you can add new contacts to your contact list.
- Select ‘Detect get2Clouds contacts’ to see if you already have get2Clouds contacts.
- Select ‘New Contact’.
- Enter the name, number and email address of your new contact.
- Select ‘OK’ to add the new contact.
Chat with Other get2Clouds Users
- Select ‘+ New chat’ button in the bottom right of screen
- You can double click on the contact you would like to chat within your contacts list.
- You can add a new contact to chat with in the ‘contacts’ tab
- Select ‘New Contact’ and enter their name, phone number and email address.
- Enter your message and Send.
- Add an image to your message by selecting the camera icon.
- Add ‘E2E’ to encrypt your message and set an encryption password for increased security.
- You can also add an access PIN to your chat for further security by selecting the lock icon and entering a personalize PIN. That way only you and the person you are chatting with have access to the conversation.